> For the complete documentation index, see [llms.txt](https://deco-product-labels-and-badges-1.gitbook.io/deco-guidelines/llms.txt). Markdown versions of documentation pages are available by appending `.md` to page URLs; this page is available as [Markdown](https://deco-product-labels-and-badges-1.gitbook.io/deco-guidelines/our-special-features/customer-conditions.md).
# Customer Conditions
This is where to select which customer groups can see your badge!
## How It Works
⇒ If you sell B2B or wholesale and have different customer groups, this feature is for you.
⇒ It allows you to ***create targeted promotions and experiences for each customer segment***, helping you serve different groups more effectively.
{% hint style="info" %}
Available from the **Growth** plan.
{% endhint %}
## Detail Steps
### ✨ Step 1: Open An Existing Badge
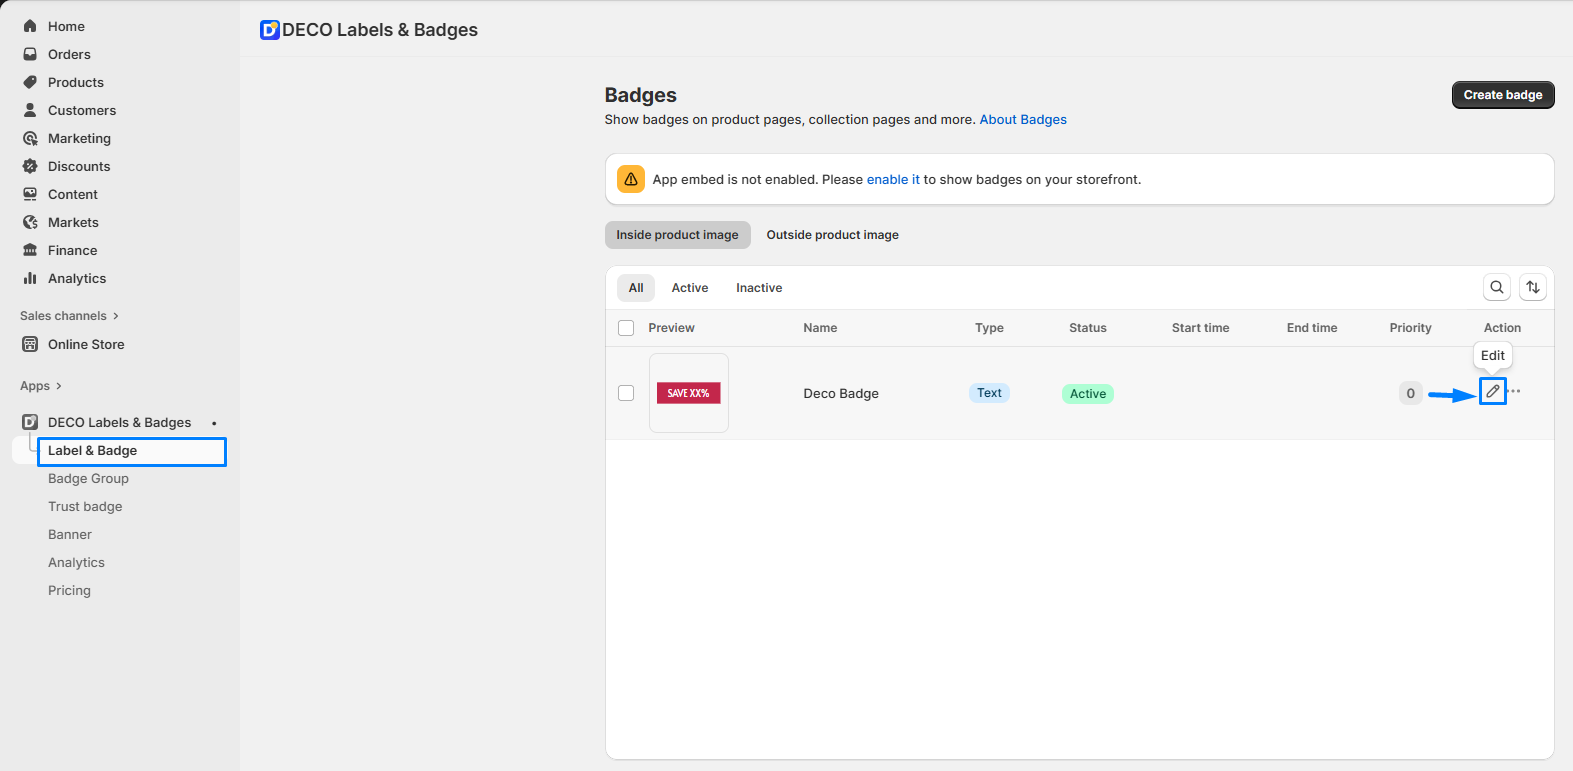
* Navigate to: ***"Label & Badge"*** in the navigation menu >> Click on the ***pencil icon*** to open any badges
### ✨ Step 2: Set Up The Customer Conditions
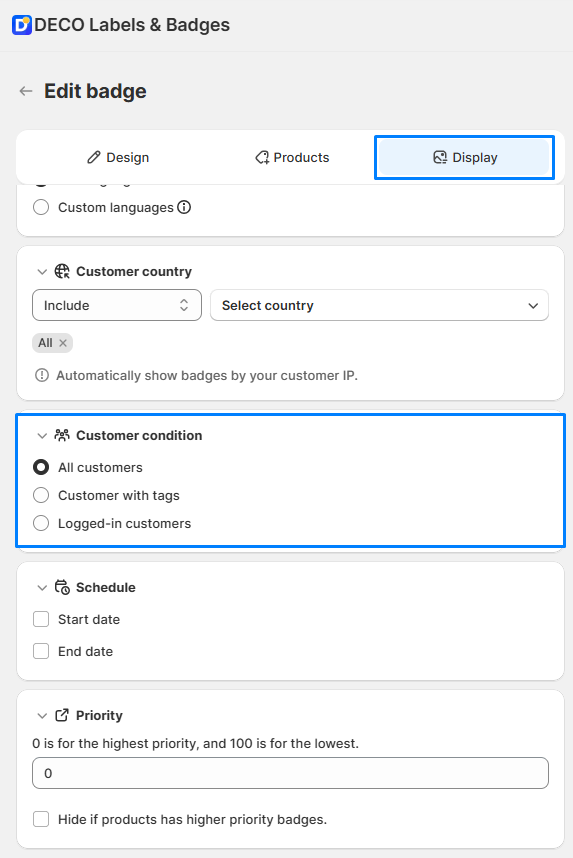
* Then you'll see this screen, go to: "Display" tab >> Scroll down to "Customer condition" section. Choose one of the following options:
1/ **All customers**: The badge will be ***visible to everyone*** visiting your store.
2/ **Customer with tags**: The badge will be ***visible or hidden*** based on ***specific customer tags***. Choose **Include** (show only to customers with these tags) or **Exclude** (hide from customers with these tags), then type your tags and click **Add**.
{% hint style="warning" %}
Tag rules only apply to signed-in customers. Guests (not logged in) never see a badge that uses "Customer with tags", even with **Exclude**.
{% endhint %}
3/ **Logged-in customers**: Target shoppers by their login status. Pick one:
* **Only logged-in customers**: The badge will ***only appear*** to customers who are ***signed into their accounts***.
* **Only guests**: The badge will only appear to shoppers who are ***not signed in***.